Visual Lane Guidance
- Task Interface for VLG
- Evaluating a VLG Step
A. Find the VLG Step in the Step List
B. Determine the Intent of the VLG
C. Research and Answer Ground Truth Questions
D. Evaluate Provided VLG
Tip of the Month
VLG Reference URLs
Including VLG Reference URLs is mandatory. If street level imagery is available when
determining the Correct VLG, you should always include this link. If only external satellite
images are available they can be included in place of street level imagery. Only links should be
given in this field. See VLG Guidelines Ch. 4.1.7. VLG Reference URLs.
1: Task interface for VLG
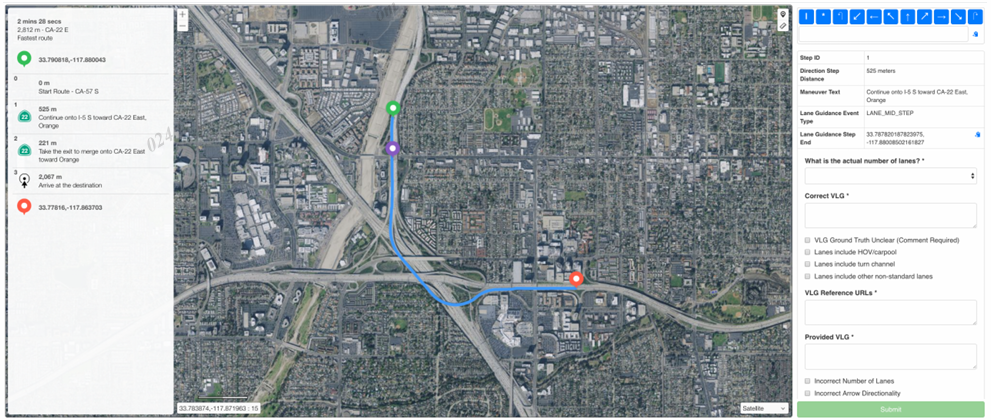
Below is an overview of the terminology that will be used throughout this document when referring to different parts of the rating interface. Please use this as a reference when going over the workflow provided for a specific example in this document.
| VLG Reference information |  | This contains information that will be used to determine which VLG Step you will be evaluating. Located on the right side of the rating tool. |
| Step List | 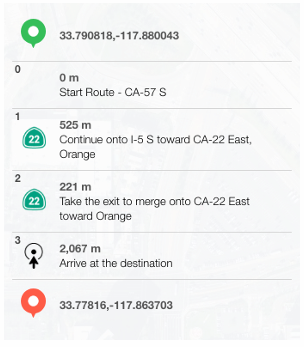 | All the steps within the route will be displayed on the left side of the rating tool. |
| Route Step |  | The Step List will consist of several numbered Route Steps. These Route Steps contain the VLG Step that you will be evaluating. |
| VLG Step | 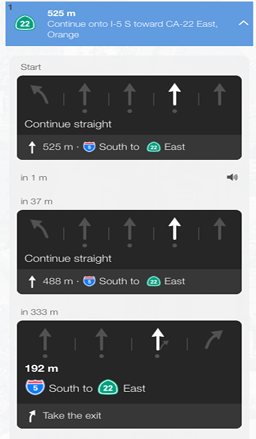 | VLG Steps are located within the Route Steps. The purpose of a VLG Step is to tell the user to perform a certain maneuver within the Route Step so each VLG Step is only a portion of the whole Route Step. Even though each Route Step can include multiple VLG Steps only a single VLG Step will be evaluated in this task. |
| VLG Arrow Panel |  | These are the arrows within each VLG Step that should represent the lane configuration at the time the user will be performing a specific maneuver instructed by this VLG Step. Essentially these are a representation of what we believe the road network looks like at the Critical Point. |
| VLG Maneuver | 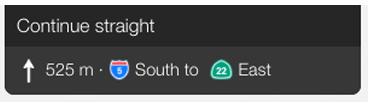 | Each VLG Step is instructing the user to perform a specific maneuver which can be viewed as the intent of the VLG Step. This maneuver will be written below the VLG Arrow Panel. In this case the maneuver is to Continue straight onto I-5 S towards CA-22 East. |
| Critical Point | Illustrated in Section 2B – Determine the Intent of VLG | This refers to the exact position on the road within the VLG Step where the instructed maneuver is going to be carried out by the user. This is usually located at or near the purple pin which pops up on the Task Map once the VLG Step is selected. |
2: Evaluating a VLG Step
The overall process for evaluating a VLG Step can be broken down into 4 sections:
A: Find the VLG Step in the Step List
Provided below is a quick workflow on how to find the VLG Step that you will need to evaluate. Please refer to the table above for relevant terminology.
| Screenshot | Description |
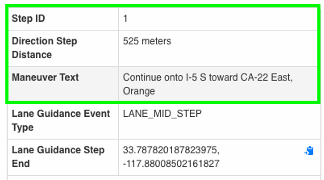 | The VLG Reference Information will help you determine which VLG Step you will be evaluating. There are three pieces of information that will help you find the appropriate VLG Step: 1) Step ID: This lists the number of the Route Step that contains the appropriate VLG Step. 2) Direction Step Distance: Shows the distance within the Route Step where the appropriate VLG Step is located. 3) Maneuver Text: Contains the same information as the VLG Maneuver but in a different format. |
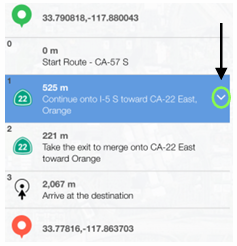 | Click on the corresponding Step ID in the Step List on the left-hand side of the interface. Clicking the step will highlight it in blue and a white dropdown arrow will appear. Click on the white arrow and the step will expand. |
 | The Route Step we are evaluating has several VLG steps. Use the Direction Step Distance and Maneuver Text to determine which VLG you will need to evaluate. Direction Step Distance: 525m Maneuver Text: Continue onto I-5 S toward CA-22 East, Orange Note: There may be situations where the Direction Step Distance matches more than one VLG Step. If this happens, evaluate the first VLG Step. |
 | After you have found the appropriate VLG Step within the Route Step you will need to highlight the VLG Step on the Task Map. To do this, click on the VLG Arrow Panel associated with the appropriate VLG Step. This will highlight the VLG Step on the Task Map. Make sure to ONLY click on the VLG Arrow Panel and NOT the VLG Maneuver area. Clicking on the VLG Maneuver will highlight the entire Route Step not the VLG Step. |
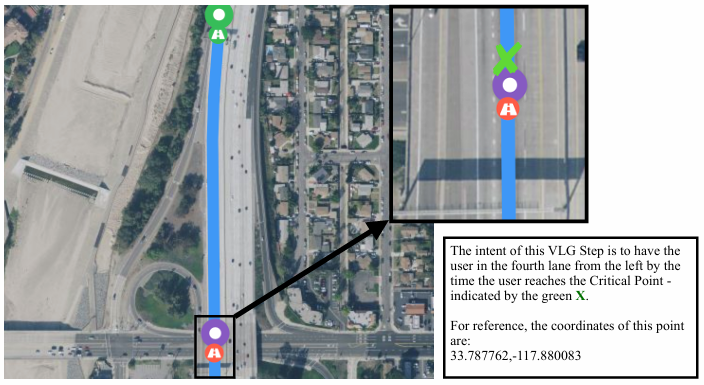
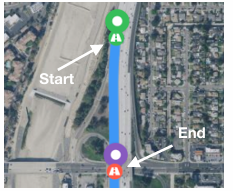 | A green icon and red icon will appear on the route at the start and end of the VLG Step that you will be evaluating. The purple pin, usually near the end of the VLG Step, should be used as a reference to help locate the Critical Point. In this example, the coordinates for this point are: 33.787762,-117.880083. |
B: Determine the Intent of the VLG
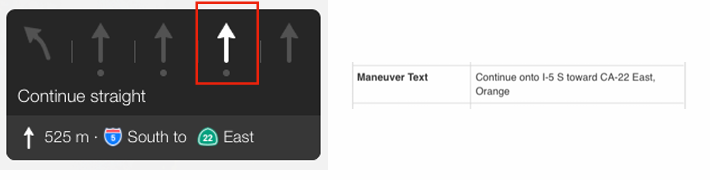
In order to determine the intent (or specific maneuver) of each VLG Step, we need to figure out where the Critical Point is located. In other words, we need to figure out the point on the road within the VLG Step where the VLG Maneuver will actually be carried out by the user. This specific location along the route is what we call the Critical Point. The VLG Maneuver is ‘Continue straight’ on 5 South towards 22 East. We can determine this from the Provided VLG and the Maneuver Text.
We are instructing the user to stay in one specific lane: the fourth lane from the left. This will allow the user to successfully complete oncoming maneuvers. The Critical Point is the location where the user must carry out (or has already carried out) this maneuver. In this case, as in most cases, the Critical Point is located at or near the purple pin:
Tips for finding the Critical Point:
Use street imagery whenever possible to determine the true lane configuration at the Critical Point.
- Use the Drop Pin tool to retrieve the coordinates of the purple pin location in the Task Map.
- Go into street imagery a few meters before the purple pin location and start inching towards the pin. – Make sure you are moving in the same direction as the route.
- The Critical Point will most likely be right before or at the purple pin
C: Research and Answer Ground Truth Questions
After having determined what the VLG Intent and Critical Point are, we proceed to carry out research to be able to answer Ground Truth Questions. These questions all relate to what we call the Correct VLG. The Correct VLG is what we can determine is the correct layout of the road network at the Critical Point.
There are several parts that will need to be evaluated for the Correct VLG portion. Below is a thorough breakdown of each part and an explanation of what you will be expected to evaluate and how.
Things to keep in mind:
- Only include lanes that are part of the immediate road network
- -These lanes should be physically accessible to the user -See VLG Guidelines Ch. 4.1.1 What is the actual number of lanes?
- The Correct VLG should represent the ground truth at the Critical Point
- -Use the VLG Ground Truth Unclear checkbox whenever you are not sure whether or not the lane configuration is up to date in street or satellite imagery and have reason to believe it may have changed -See VLG Guidelines Ch 4.1.3. VLG Ground Truth Unclear
| Question | Screenshot | Description |
| Whatistheactual number of lanes? | 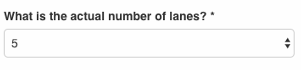 | For this example street imagery easily allows us to determine that 5 lanes are part of the immediate road network at the Critical Point location. |
| Correct VLG | 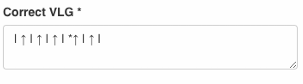 | The Correct VLG should be a representation of what you see in street or satellite imagery at the Critical Point. Although the left lane and right two lanes eventually become exit lanes, at the Critical Point they still appear to be going straight. Only use this section for VLG arrows, do not add other information in here |
| Correct VLG Checkboxes | 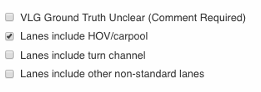 | These checkboxes should be used to point out anything special or unclear about the lane configuration at the Critical Point. In this example, street imagery and satellite imagery allow us to determine that the left-most lane is an HOV lane. This is indicated by a series of diamonds on the road. |
| VLG Reference URLs | 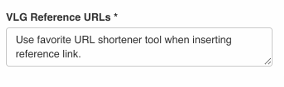 | Only use this section for links, do not add other information in here. It is mandatory to include a link to a reference or references used to determine the Correct VLG at the Critical Point. Links to street imagery are preferred but satellite can be used when street imagery is not available. |
D: Evaluate Provided VLG
The Provided VLG questions relate to the VLG Step you are evaluating as it is shown in the Rating Tool. This section can be viewed as a comparison between the Correct VLG and the VLG we provide in the tool.
There are several parts that will need to be evaluated for the Provided VLG portion. Below is a thorough breakdown of each part and an explanation of what you will be expected to evaluate and how.
| Question | Screenshot | Description |
| Provided VLG | 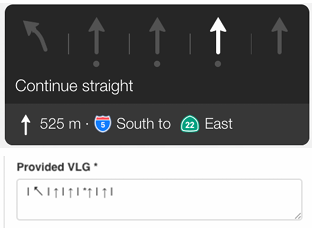 | The Provided VLG should just be a representation of the VLG shown in the VLG Arrow Panel within the Route Step. Use the blue arrow bank at the top to re-create the arrows shown in the black VLG Arrow Panel and then paste them into the Provided VLG window. Only use this section for VLG arrows, do not add other information in here. |
| Provided VLG Checkboxes | 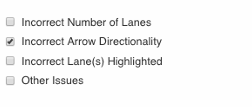 | These checkboxes should be used to point out any differences between the Provided and the Correct VLG at the Critical Point. These differences are referred to as ‘Errors’ in the VLG Guidelines. Simply look back on what you determined the Correct VLG to be and mark the differences using these checkboxes. In this example, we’ve decided that all lanes should be depicted as straight (| ↑ |) in the Correct VLG field. Therefore, the Arrow Directionality in our Provided VLG should be considered incorrect. |
| Likelihood to Miss | 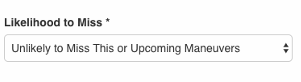 | This should be used to indicate the severity of the difference(s) between the Correct and Provided VLG in terms of how it would affect the maneuver the user will be performing. The only difference we see in this example is that the left lane directionality is depicted as a slight left in the Provided VLG while we had decided it should be straight in our Correct VLG. The maneuver in this VLG Step is to stay in the fourth lane from the left, which is the indicated preferred lane. Since this difference does not affect the preferred lane it should have no impact on the user’s ability to perform this maneuver. |
| User Perception |  | This should be used to indicate the severity of the difference(s) between the Correct and Provided VLG in terms of how noticeable this difference will be to the user. As mentioned previously the maneuver in this VLG Step is to stay in the fourth lane from the left. This means the difference in the directionality of the very left lane will likely not be that noticeable. |